A bit annoyed that I hadn't posted this here, but now is as good a time as any to post this. I was fortunate enough to work on this project, updating the various character rigs and a few props with new deformers and added control systems. It feels like the light at the end of the tunnel is starting to appear and gain in intensity. Soon we'll all get to see the wondrous horrors that this film contains.
La Noria Teaser from Carlos Baena on Vimeo.
La Noria Teaser from Carlos Baena on Vimeo.
While the main campaign is over, you cans still grab some of the rewards, which are pretty cool.
La Noria Indiegogo Page.
Thats all for now.
Cheers!
Showing posts with label Renders. Show all posts
Showing posts with label Renders. Show all posts
Wednesday, March 16, 2016
Saturday, November 22, 2014
Oh cheese and crackers!
I haven't touched this thing in a while, have I? Well today is the day to change that. Let's drop some crazy amount of render updates on the golem from earliest to latest.


Then, lets show how crazy this rig can be:

Having to create a write up for this beast, it totals to about 21 pages, covering all of the controls it has throughout the rig. The file alone sits at near 300mb from all of the ivy, and when I sent it in for testing, a lot of feedback mentioned how overwhelming this rig looked to them. I shouldn't smile so big about that, but at the same time, its just a sign of the level of control I've given them, should they take on the task of animating it.
Then, lets show how crazy this rig can be:
Having to create a write up for this beast, it totals to about 21 pages, covering all of the controls it has throughout the rig. The file alone sits at near 300mb from all of the ivy, and when I sent it in for testing, a lot of feedback mentioned how overwhelming this rig looked to them. I shouldn't smile so big about that, but at the same time, its just a sign of the level of control I've given them, should they take on the task of animating it.
Saturday, December 8, 2012

Monday, November 5, 2012
Organic 2 mid term


My mid term for my organic 2 class. Zbrush is not a good texturing tool, but it can sculpt something fierce.
Thursday, April 5, 2012
A bit of both worlds
So I decided to open an old file. Decided to just paint over it rather than render and texture in Maya. I actually like it better this way than trying to second guess the settings over and over, then wait to find that it looks wrong. I kinda like how its looking so far, but I think I might add more to it.

Below shows the current steps to get there.
 And one more update, adding some more highlights and adjusted lighting.


Below shows the current steps to get there.


Tuesday, August 23, 2011
Friday, August 12, 2011
Wednesday, August 3, 2011
Update 09-03-2011
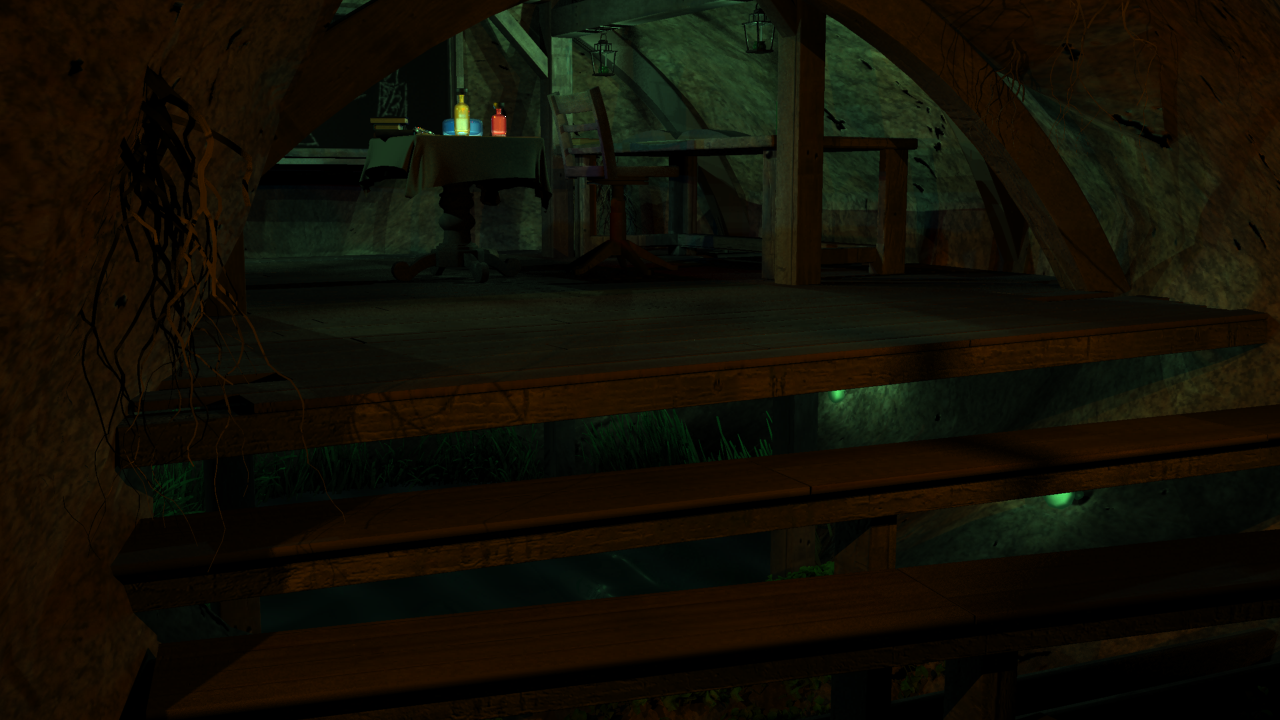
Decided to go back to this project again and try to finish it up a bit more. Altered some textures and replaced 2 of them. Added some lights for the glow caps beneath the platform in order to show their own light, as well as increase the visibility of the plants and water. Also stopped using final gather in order to reduce render time. At this point I don't think I'll need it for the scene.
Friday, July 22, 2011
Zombie project


Reviving some files from the 10th planet project so I can update my reel. Still have the fly by scene to re render, though I'm going to have to add stuff into it for quality sake.
[edit]
Adding the turn table and short animation done for the project
Monday, May 2, 2011
Website Assets WIP
So then, while I continue to find work, I've decided to rebuild my website. From scratch. So below is what I'm going to use for my UI. Figured I needed some practice in my cg work, going from modeling up to rendering.

So this first piece is just the current layout of all the components built thus far. Not much of anything to look at from this angle. The back wall is going to collapse and pull sideways to reveal a large monitor. Thats going to function as my gallery menu. The massive computer terminal will be the demo reel and video menu.

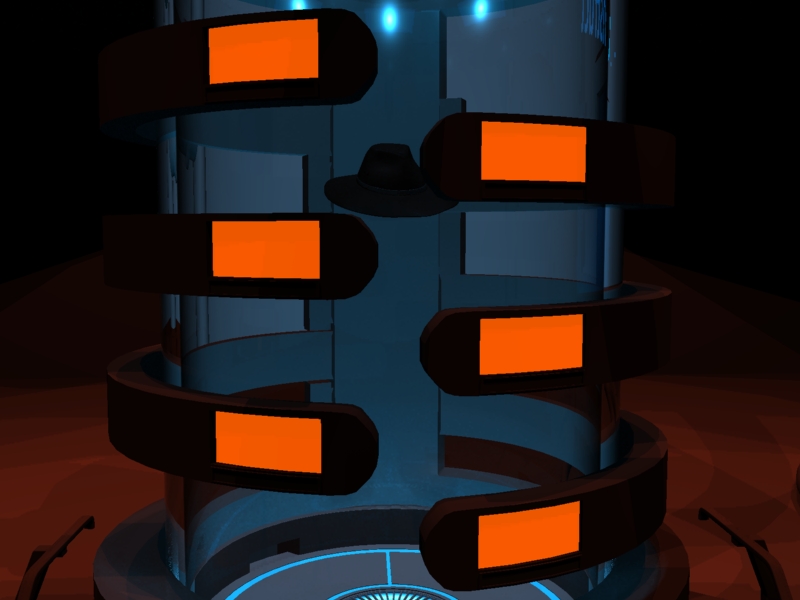
This is going to be the website HUB. The orange panels will link to the different sections of the site, minus two which link out to this blog and my new blog.

[update 06022011]

This is going to be the first thing that the viewer see's once the site loads. Will add some sort of panel that says enter/proceed. Something fancy like.

This will be the links page, or at least that which leads to my friends. Need to add another panel for my personal links, which will be on that space on the right. Also added that pipe with the blue liquid in the background, because lets face it: what lab doesn't have some volatile substance draining from some hidden location into another tank for all to see? Also going to add some kind of indicator bar just above the link screen, as well as some kind of touch panel interface for the window, since it seems a bit empty there.

Just an overhead of what the floor of the tank looks like.

quick and dirty render of the website sign.

So this first piece is just the current layout of all the components built thus far. Not much of anything to look at from this angle. The back wall is going to collapse and pull sideways to reveal a large monitor. Thats going to function as my gallery menu. The massive computer terminal will be the demo reel and video menu.
This is going to be the website HUB. The orange panels will link to the different sections of the site, minus two which link out to this blog and my new blog.

[update 06022011]

This is going to be the first thing that the viewer see's once the site loads. Will add some sort of panel that says enter/proceed. Something fancy like.

This will be the links page, or at least that which leads to my friends. Need to add another panel for my personal links, which will be on that space on the right. Also added that pipe with the blue liquid in the background, because lets face it: what lab doesn't have some volatile substance draining from some hidden location into another tank for all to see? Also going to add some kind of indicator bar just above the link screen, as well as some kind of touch panel interface for the window, since it seems a bit empty there.

Just an overhead of what the floor of the tank looks like.

quick and dirty render of the website sign.
Tuesday, April 26, 2011
blowing off the layer of dust
Going to post a bit of what I did here. or rather link to it.
Did the whole of the ships sequences, from modeling up to the final comps, as well as the vid showing a gun being modeled. I'm not particularly thrilled with the final pieces, since I short-cutted so much of the rendering to meet the deadline that had popped up within the week while my machine was handicapped, so I feel I could have done a better job rendering. If the project ever picks up again, I'll reconsider doing those particular sequences with the proper setup, but for now I'm not gonna touch them. Going to work on some personal stuff again, now that I have a new machine and some time. Mainly going to redo my website (make a flash and html version).
Did the whole of the ships sequences, from modeling up to the final comps, as well as the vid showing a gun being modeled. I'm not particularly thrilled with the final pieces, since I short-cutted so much of the rendering to meet the deadline that had popped up within the week while my machine was handicapped, so I feel I could have done a better job rendering. If the project ever picks up again, I'll reconsider doing those particular sequences with the proper setup, but for now I'm not gonna touch them. Going to work on some personal stuff again, now that I have a new machine and some time. Mainly going to redo my website (make a flash and html version).
Saturday, January 15, 2011
15-01-2011

added a blackboard, books, a magnifying glass, and a wine bottle. Figured I won't show the walls since they are going to get rebuilt from scratch anyway.
[update] 17-01-2011
Walls added. Redid the glow caps and changed some of the plant life.

9 lights, 9 layers.

Tuesday, January 11, 2011
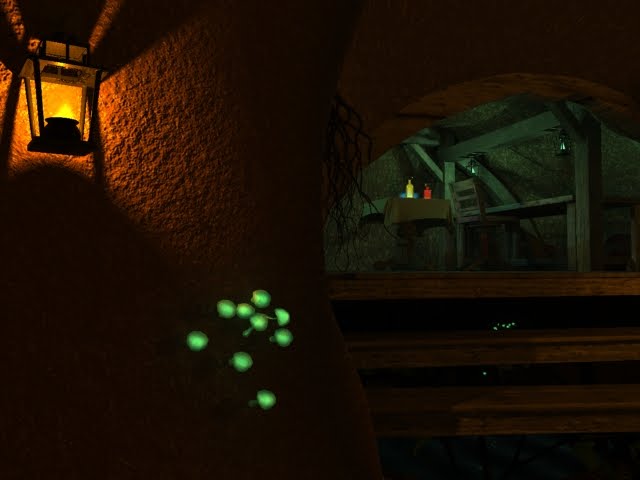
Hovel revive

Decided to dust off this piece from last year and begin updating it. I need to rework a lot of the objects since the geometry is too dense for what the object is. I'll probably add more glow cap mushrooms underneath the floorboards to emphasize the water thats supposed to be there, as well as show the plants that are in there as well. I know I'll add some more objects into the room as well, though I'm not certain what they'll be just yet. maybe some tools or pictures. I also figured out how to get the fluids to act like fire, so the lanterns will have flames in them finally.
[updated w/ new light to brighten dark spot and slightly desaturated the green lanterns in the room.
Thursday, August 19, 2010

Tuesday, August 17, 2010
Under the Bridge
The next plate shot for the prowler, this time with more structures involved.

[Update 10/12/2010]
Did some adjustments and changed the scale of the car, since it was too big in comparison to the truck you see in the background. Still needs some fine tuning though


[Update 10/12/2010]
Did some adjustments and changed the scale of the car, since it was too big in comparison to the truck you see in the background. Still needs some fine tuning though

Saturday, August 14, 2010
quick test

A test render with just a beauty pass on it and radial blur on the wheels. I'll put up a complete version later.
[Edit]
Final version

Contains a beauty, diffuse, occlusion, spec, and reflection passes. Compiled in photoshop
Tuesday, August 3, 2010
08032010

This took a little over 4 hours to render out. Need to make some adjustments and fix the lights a bit more.
Tuesday, July 27, 2010
07272010
Decided to change things up and retexture the TMR using mental ray and trying out the mr lights. So far I've only used a portal light for overhead. Gonna add the remaining 5 for the display boards, and probably make a new environment for it.


Wednesday, June 9, 2010
Darkness Flows
Built this a while ago, but decided to finish it a bit, including a working blade adjust, power adjust, and power switch.


It also has color adjustment controls for both the glow and blade colors for added variation.
ex.


I intend to make this a full on dual phase saber, adding another control point so the blade can snap forward at least another foot.


It also has color adjustment controls for both the glow and blade colors for added variation.
ex.


I intend to make this a full on dual phase saber, adding another control point so the blade can snap forward at least another foot.
Wednesday, June 2, 2010
Prowler update 02062010
Another update to this handsome beast. The headlights got rounded out and a large amount of geo got cleaned again from the wire frame turn around I posted. It still needs a bit of work, and I'm debating on whether or not I should put turn signal lights on the sides and those extra lights some cars have on the lower front bumper.

[Update]
Added close-ups of the head lights and tail end.


[UPDATE #2]
A bit more cleaning and usage of sub-d to ease the rendering a bit. Render layers are just about set, and now the car has rear view mirrors. Unfortunately, for some reason, when rendering a reflection pass of diffuse pass, it reads glass as a negative space and masks it out or leaves it completely black. Pulled out a separate layer to do these, but still wondering about it.

Subscribe to:
Posts (Atom)